Androidアプリで画面遷移(Kotlin)
Androidアプリでの画面遷移のサンプルコードを載せてみたいと思います.
明示的Intentと呼ばれるものです.
画面遷移は,たくさん実装方法があるので,一例として御覧ください.
以下目次です.
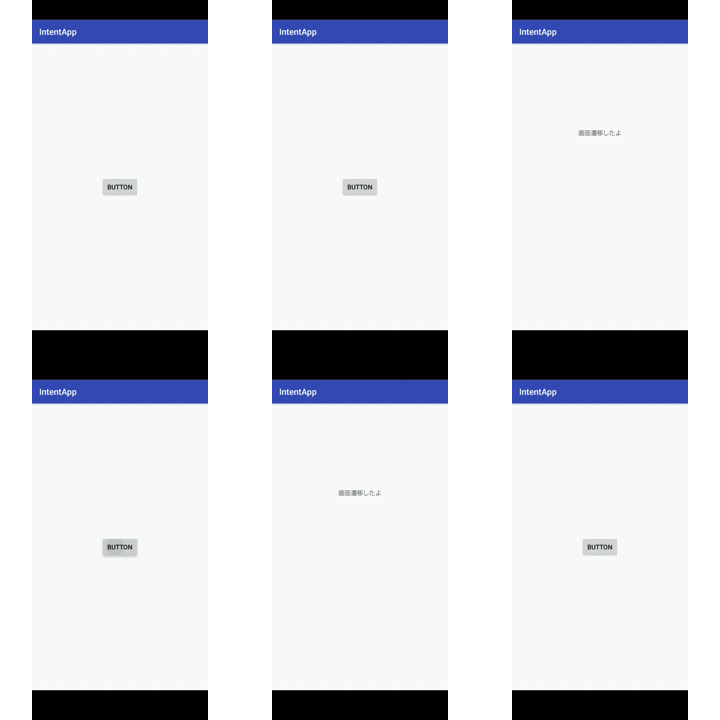
動作画面

画面上には写ってませんが,バックキーをタップして遷移先から遷移元へ戻っています.
Galaxy Note8の録画機能を使って撮影しました.
開発環境
| macOS High Sierra | 10.13.4 |
| Android Studio | 3.1.2 |
| Kotlin | 1.2.40 |
| Galaxy Note8 | 8 0.0 |
遷移元のコード
まずは,MainActivity(遷移元)のレイアウトです.
<?xml version="1.0" encoding="utf-8"?>
<android.support.constraint.ConstraintLayout xmlns:android="http://schemas.android.com/apk/res/android"
    xmlns:app="http://schemas.android.com/apk/res-auto"
    xmlns:tools="http://schemas.android.com/tools"
    android:layout_width="match_parent"
    android:layout_height="match_parent"
    tools:context=".MainActivity">

    <Button
        android:id="@+id/button"
        android:layout_width="wrap_content"
        android:layout_height="wrap_content"
        android:text="Button"
        app:layout_constraintBottom_toBottomOf="parent"
        app:layout_constraintEnd_toEndOf="parent"
        app:layout_constraintStart_toStartOf="parent"
        app:layout_constraintTop_toTopOf="parent" />
</android.support.constraint.ConstraintLayout>
MainActivity(遷移元)のKotlinのコードです.
class MainActivity : AppCompatActivity() {

    override fun onCreate(savedInstanceState: Bundle?) {
        super.onCreate(savedInstanceState)
        setContentView(R.layout.activity_main)

        // Buttonの宣言
        val button: Button = findViewById(R.id.button)
        // Intent作成
        val intent: Intent = Intent(this@MainActivity, NextActivity::class.java)
        // Button(IDがbutton)をタップされた際の処理
        button.setOnClickListener {
            startActivity(intent)
        }
    }
}
レイアウトのButtonに
android:id="@+id/button"
のように,IDを振り分けました.
ですのでKotlin側でButtonを操作するために
val button: Button = findViewById(R.id.button)
と記述します.
もし,
android:id="@+id/button2"
のようになっていたら
val button: Button = findViewById(R.id.button2)
としなければなりません.
また今回は,Buttonを操作するので,Button型を使います.
複数のウィジェット(Buttonや,TextViewなど)を使いたい場合,IDが重複してはいけません.
遷移先のコード
次にNextActivity(遷移先)のレイアウトです.といっても初期状態からTextViewの文字を変更しただけですが.
<?xml version="1.0" encoding="utf-8"?>
<android.support.constraint.ConstraintLayout xmlns:android="http://schemas.android.com/apk/res/android"
    xmlns:app="http://schemas.android.com/apk/res-auto"
    xmlns:tools="http://schemas.android.com/tools"
    android:layout_width="match_parent"
    android:layout_height="match_parent"
    tools:context=".NextActivity">

    <TextView
        android:id="@+id/textView"
        android:layout_width="wrap_content"
        android:layout_height="wrap_content"
        android:text="画面遷移したよ"
        app:layout_constraintBottom_toBottomOf="parent"
        app:layout_constraintEnd_toEndOf="parent"
        app:layout_constraintStart_toStartOf="parent"
        app:layout_constraintTop_toTopOf="parent"
        app:layout_constraintVertical_bias="0.3" />
</android.support.constraint.ConstraintLayout>
最後にNextActivity(遷移先)のKotlinのコードです.こちらは,初期状態のままで何も変えていません!
class NextActivity : AppCompatActivity() {

    override fun onCreate(savedInstanceState: Bundle?) {
        super.onCreate(savedInstanceState)
        setContentView(R.layout.activity_next)


    }
}
これでAndroidでの画面遷移の解説を終わりたいと思います.
間違いなどがございましたらコメント欄でお知らせ下さい.